
Sections in this Topic
Annotate Images
You must have the role of Annotator or higher in the Notebook to annotate an image.
Annotation icons and buttons:
 |
Has annotation |  |
Rectangle annotation |
 |
Annotate image |  |
Ellipse annotation |
|
New annotation set |  |
Line/arrow |
 |
Delete annotation |  |
Freehand |
 |
Zoom in |  |
Text |
 |
Zoom out |  |
Color |
 |
Show annotation |  |
Line style |
 |
Hide annotation |  |
Line thickness |
 |
Pan/zoom |  |
Line options |
 |
Move/resize |
To try out the annotation feature:
- Open a Notebook page (in the Notebook Viewer) that contains an image entry.
- Select the image Entry to display the Entry Toolbar.
- Click on the Annotate Image button . The image will be displayed in the Annotation Editor. Note the new annotation buttons to the left and the Legend pane on the right where the annotations will be recorded.
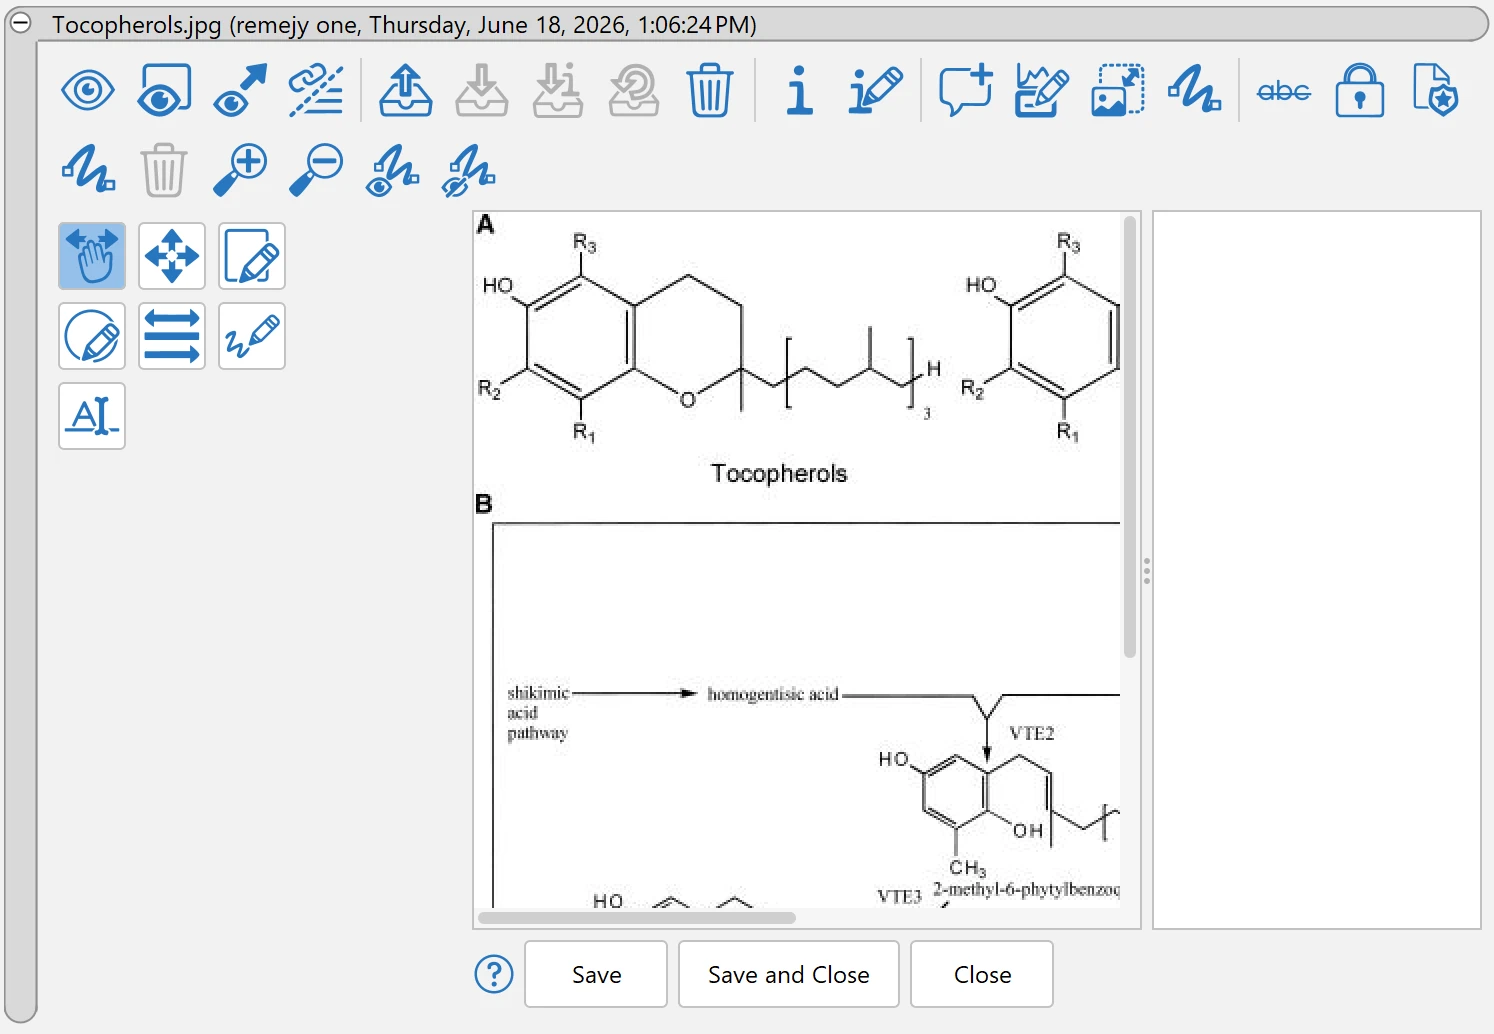
- Click on Zoom In or Zoom Out to control the magnification view for annotation purposes.
- Click on New Set to start a new set of annotations. This set will be displayed to the right in the Legend. Immediately after creating a new set, you can rename it. You can also rename it later by right-clicking and selecting Edit or by clicking twice (slowly) on the new set. Note that if you do not create a new set by clicking the New Set button, a new annotation set will automatically be created when you make the first annotation.
- Click the Rectangle button and note that when this is selected, you can select color , line style (solid, dashed, dotted) and line width for the annotation. Or you can start forming the rectangle-shaped annotation by dragging your mouse on the image and then edit the line characteristics in the Edit Annotation dialog, which is automatically launched as soon as you begin annotating. The General tab on this dialog is open by default. Change the title of this annotation if you wish.
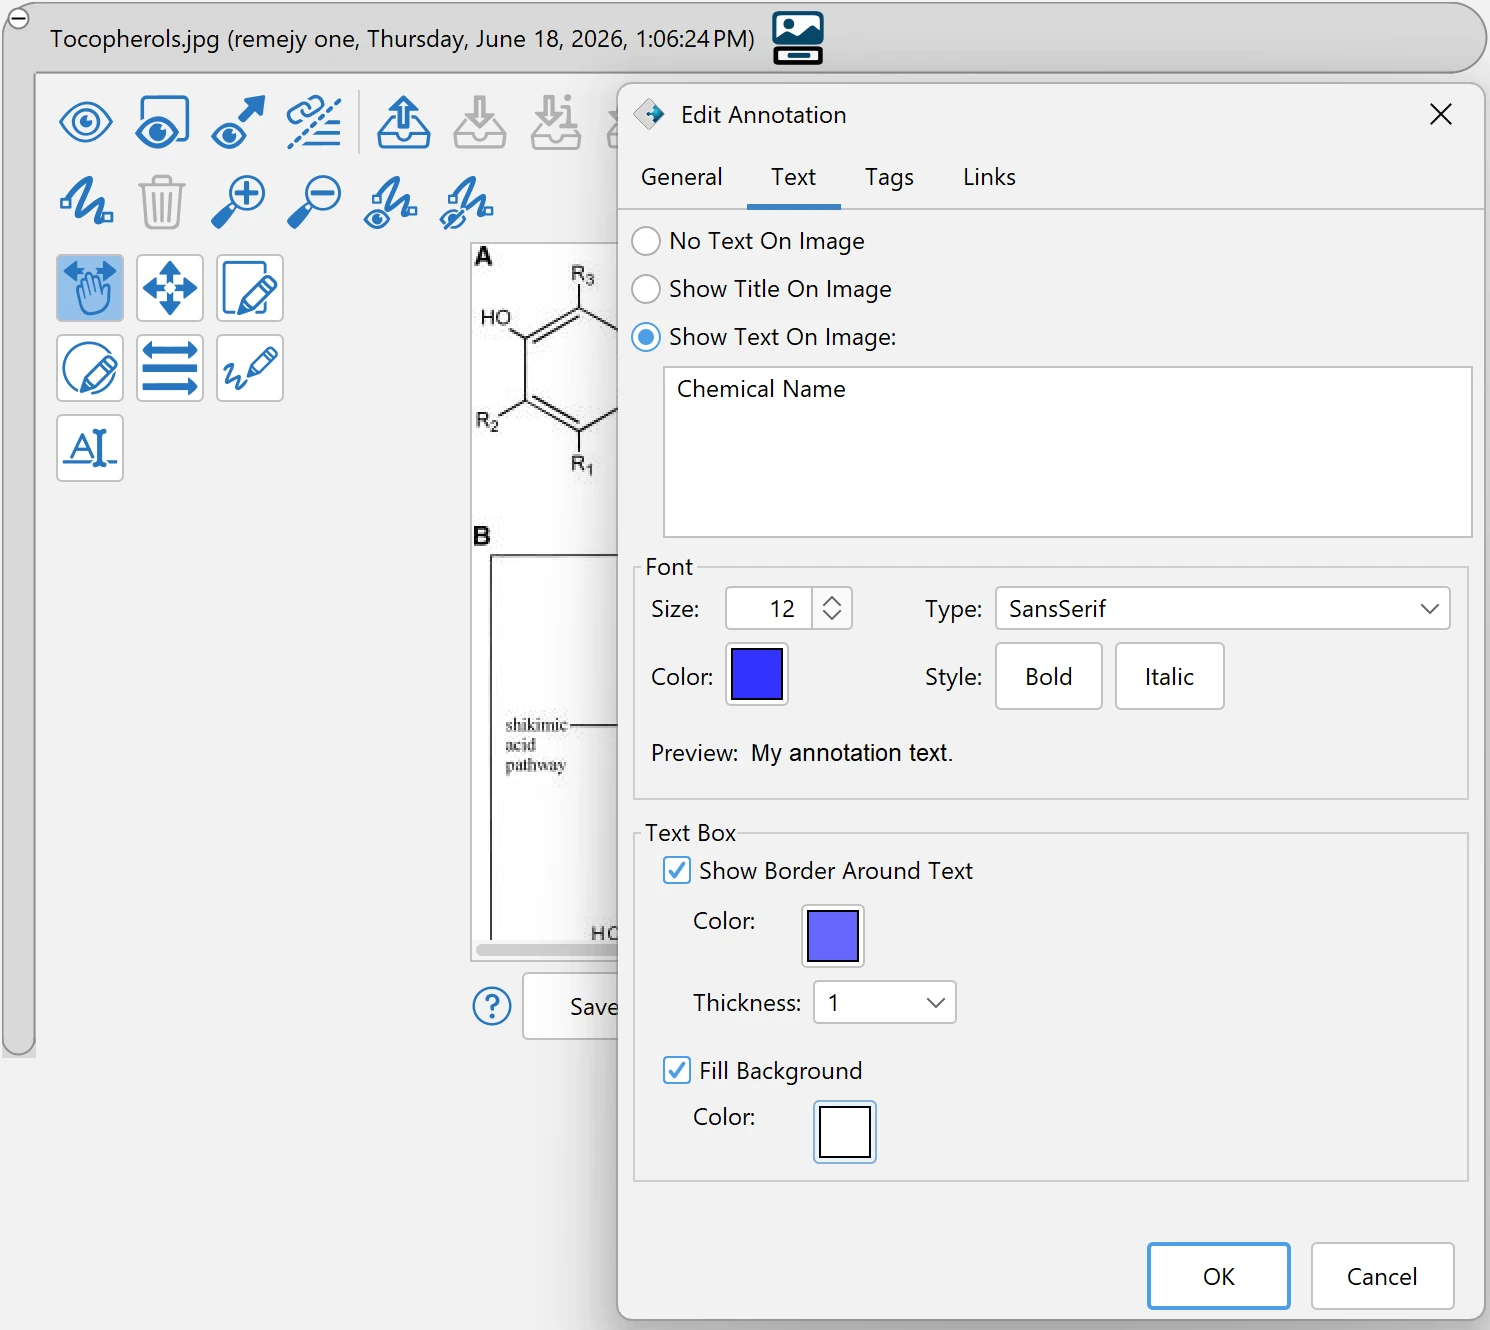
- Open the Text tab on the Edit Annotation dialog. You can choose to show text on the image or not (text can be the title of this annotation or something you write in the text box). You can also select the font characteristics in the dialog. If you want to show a line from a text box to the annotation, go back to the General Tab and select Show Connection Line to Text.
- When you have finished creating this annotation, click OK on the Edit Annotation dialog.
- You may find that the text label for the annotation needs to be moved relative to the annotation. If so, click the Move/Resize button and then move the text box and/or use the “handles” for resizing.
- Click on Save and Close.
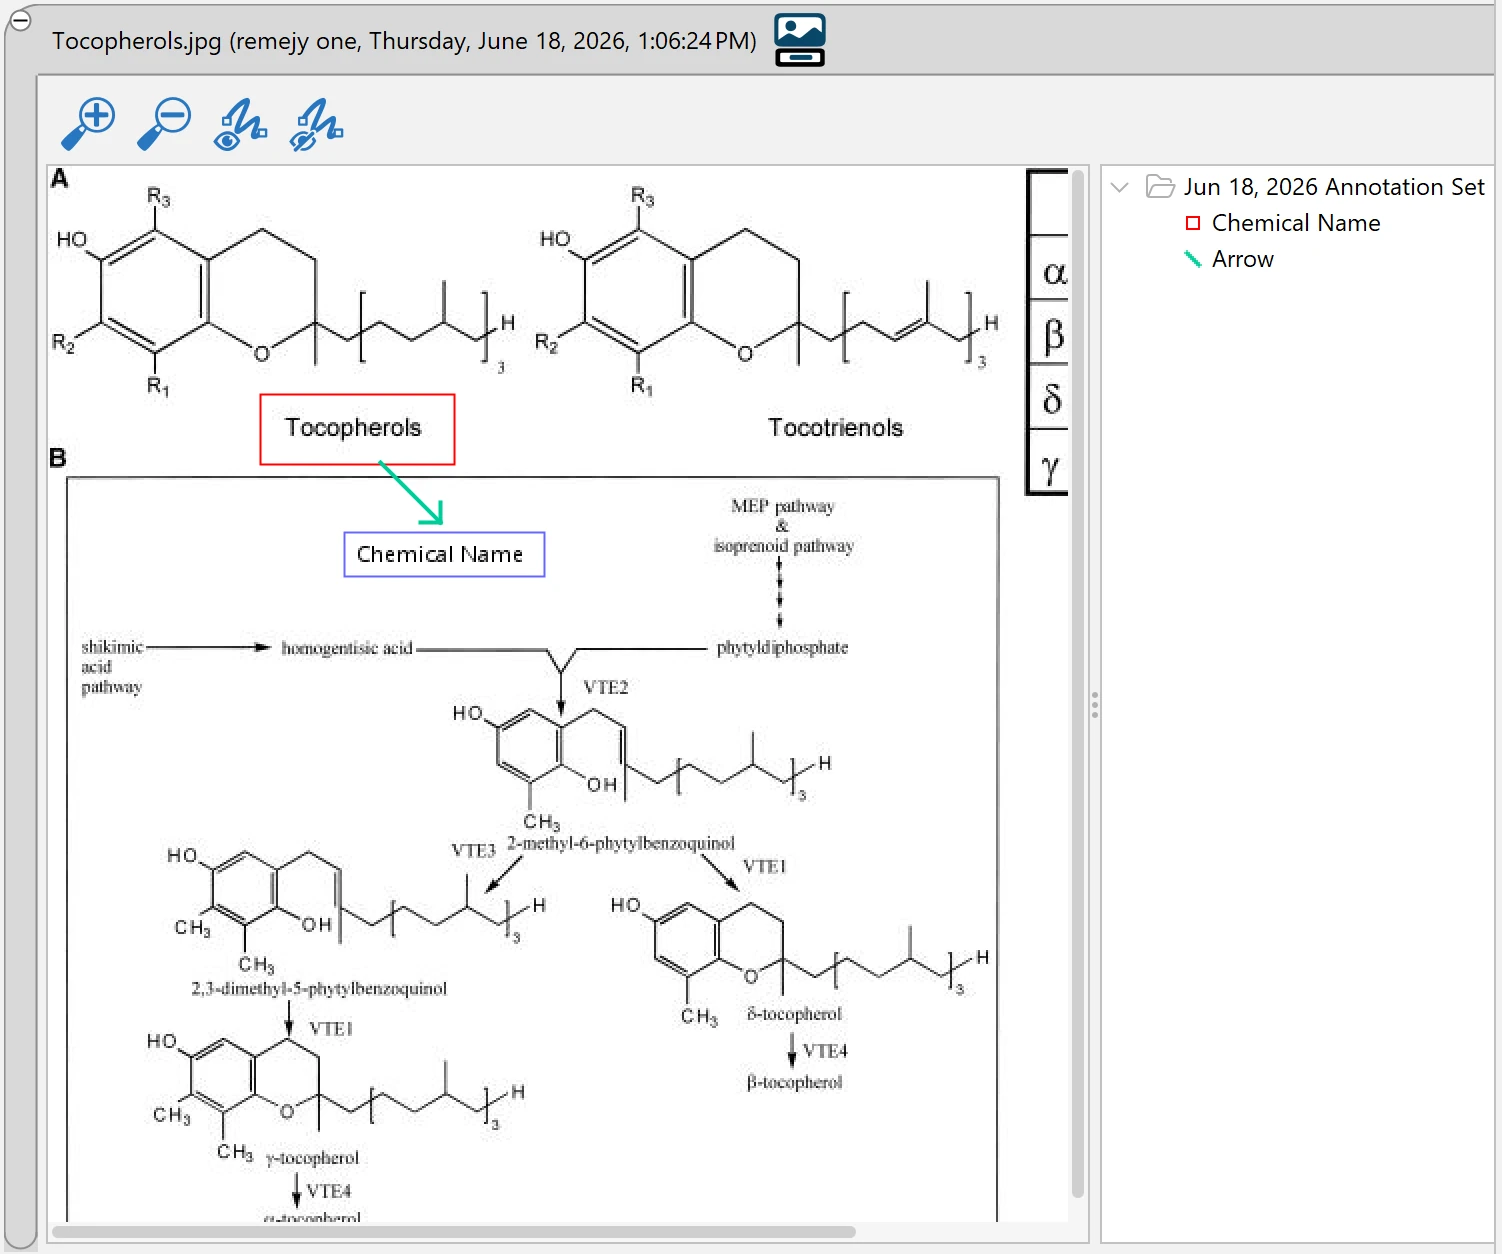
The image will now be shown at its original size and there will be a new icon on the Entry selection bar and in the CERF Tree showing that this image has an annotation. Note that when you click Save and Close, the Annotation Editor Toolbar is no longer displayed.
An annotation or annotation set is a searchable CERF Resource that is associated with the image. Note that the image annotation title is searchable, but the image annotation label is NOT indexed for searching. Keep this in mind when selecting a title for the annotation.
You can also add controlled vocabulary tags or links to the annotated image.
Tags and Links
If you want to have any controlled vocabularies associated with an annotation, open the Tags tab on the Edit Annotation dialog and click Add Tag. In the next dialog, select a vocabulary and a term and click OK.
To add a CERF link (Also called a “see also” relation) between an existing CERF Resource and this annotation, open the Links tab on the Edit Annotation dialog and clicking on Add Link. This launches the Select Resource dialog, which allows you to browse collections or search for a CERF Resource. Or if the image is in a notebook, you can simply drag a CERF Resource from the CERF Tree to the annotation that is displayed in the Legend.
Resize Notebook Image Entries
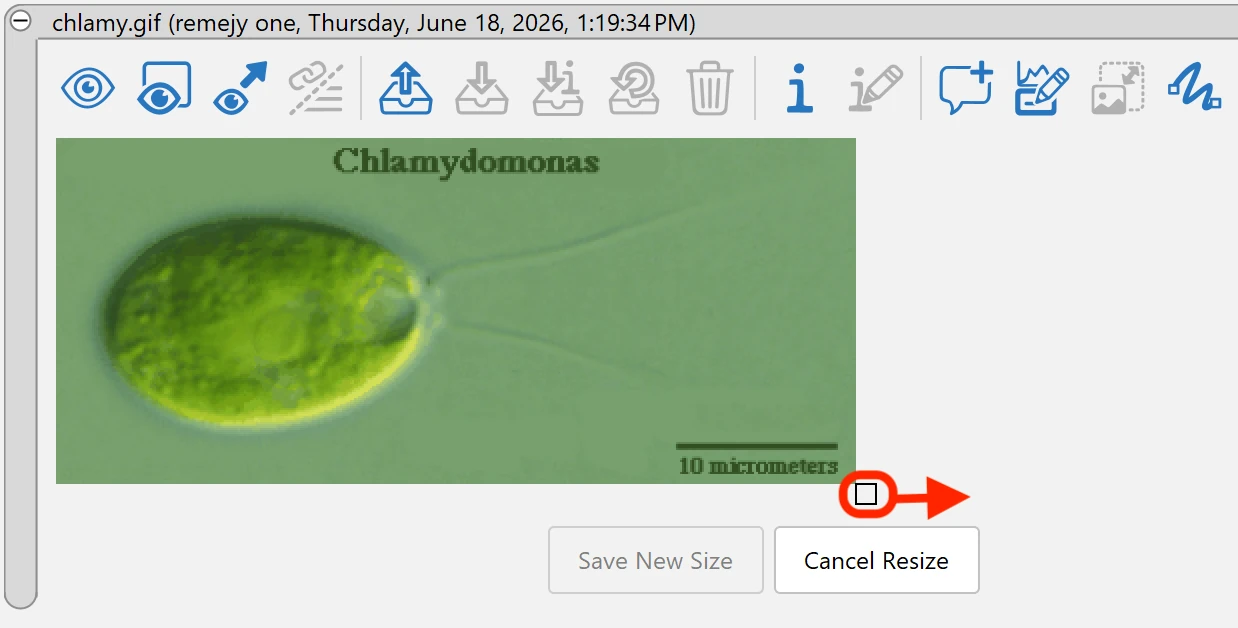
- Double-click on the image (when it is displayed in the Notebook Viewer) to display a resizing handle or select the Entry and click on the Resize
 button. If the image is displayed as a link, click the Change Display Type
  button, then choose Document to display the image inline.
 - Drag the resizing handle to reach the desired size and click on Save New Size. Note that the resolution is not final until the image is saved.
Edit Images
Check out image for editing by selecting the entry on the Notebook Page and clicking on the check out and edit button  on the Entry Toolbar. The image will open in your computer’s default image editing application. Edit the image as desired and then save the file as usual – do not use Save As. Close the image editor. Now, go back to the entry in CERF. You will see the checkmark icon, indicating that the document is still checked out. Notice that the buttons for Check In and Full Check In are now enabled. Click on (quick) Check In
  or Full Check In
  (to edit Metadata). Click OK to complete the checkin process.
The edited version of the image will now be displayed on the Notebook page. Click on the Show Metadata button on the Notebook Page Toolbar to display the metadata next to the image.
< File (Entry Type) up Free-hand Drawing >