
Sections in this Topic
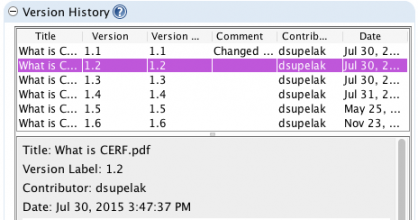
When a Resource is under Version Control, a new copy is made each time the resource is checked in. A Version History is displayed as a new pane in the Resource Info panel (or Info dialog). Select the Resource in the Document Tree and examine the Version History pane in the right-hand panel of CERF (Info). Right-click on any of the Versions in the Version History to carry out actions such as View. If you edit one of the Versions, a new branch is created. Similarly, if you copy and paste a resource as a version in CERF, this will start a new branch. In addition to Version Numbers and Labels, the Version History shows comments, Contributor (whoever made the changes to the resource is the contributor), and Date. The default for new resources will be Version Controlled
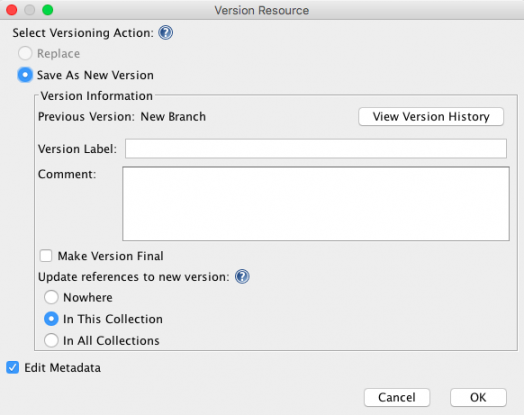
When editing Metadata, the Version Resource dialog is launched when you click on OK on the Edit Metadata dialog. When checking in (using Full Check In) the Version Resource dialog is launched first. To create a new version, select the radio button for Save as New Version. You may enter a version label and comment (optional) and select where the updated version will be displayed (generally you will want it to be shown in All Collections). Click OK.
Edit Status
Resources exist in one of four edit states: Editable, Versionable, Version Controlled, and Final (CERF follows the DeltaV versioning protocol and terminology).
Unless you specify otherwise, Resources that are submitted to CERF begin in the Version Controlled state. You can create a user preference (Tools > Options) that specifies the edit state for a resource at the time of submission. And at the time of resource submission, you can select an edit state if you wish (through the Edit Resources dialog. Note, however, that this dialog is not launched if you have selected “Drag and Drop Will Quick Add” in the Options dialog).
Resources are checked out from the CERF server for editing and the changes are made on a local copy. If the resource began as versionable, at check-in, you can allow the changes to overwrite (replace) the original (in which case, the edit state remains versionable) or you can change the edit state to version-controlled or Final. Note that the default business policy is set to create a new version when you use Check In  (if you want to keep a resource as versionable, you would need to use Full Check In
  ). To determine the Edit state of a Resource, select it in the Document Tree and look at the Info Panel (or choose View Resource Info from the right-click menu), and expand the Status pane.
| Edit State | Definition |
| Editable | An editable resource may not be put under version control. Collections, Folders, Notebook Sections and Notebook Pages are always “Editable” status. |
| Versionable | Versions may be created for a versionable resource, but until a version is created and the resource is under version control, you can keep it versionable so that changes will replace the previous copy of the resource. A versionable resource may be made version-controlled or final. |
| Version Controlled | The original copy is saved and subsequent changes are saved as a new version (i.e., as a new instance of the Resource in CERF). Once a Resource is under version control, a version history is maintained. A version-controlled resource may not be made versionable, but it may be made final. |
| Final | A Resource in the Final state may not be checked out. Thus no changes may be made to the resource or its metadata. |
Replace with New Version
You can replace a document in CERF with a document that is on your local computer. This creates a new version in CERF, so that the two documents are connected via the version history and no information is overwritten. This is very handy if you’ve been working offline. Here’s how it works:
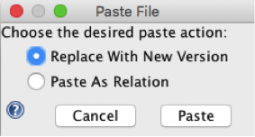
From your local filesystem, drag a document onto the file itself in the CERF tree on the left. A dialog will be launched asking if you want to Replace with a New Version or Paste as a Relation. Select Replace With New Version and click on the Paste button:
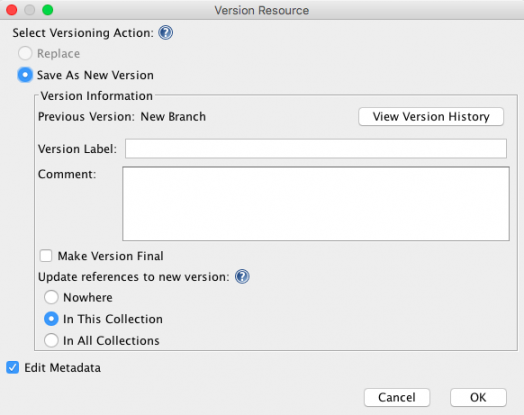
This launches the Version Resource dialog. You can add a label and comment (optional). You may want to add a comment stating that you replaced with a new version. If you want to edit metadata (e.g., to change the title or add a description), leave the checkbox selected next to Edit Metadata. Click on OK.
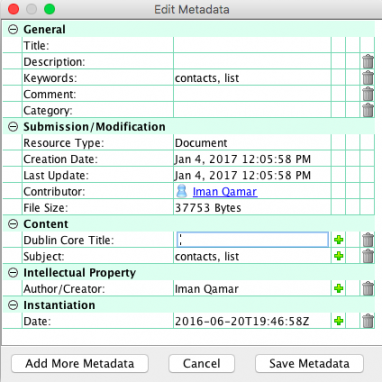
If you chose to edit metadata, the Edit Metadata dialog will be launched. If you want to change the title or add info as a description or comment, do so and click on OK.
The new document is shown in the Document Tree. In the Resource Info panel, the version history pane shows that the selected document is the latest version. You can right-click on Resources in the Version History pane to view the resource or carry out other actions on previous versions.
< Quick Paste up Metadata >